This document is intended for a Friendica archive install on a remote GNU/Linux server from a Microsoft Windows desktop computer. You can find additional documentation for more advanced installation instructions on our Resources page – or our Wiki on Github.
The instructions given in this document are for a personal site hosted on a small VPS (virtual private server). It requires access to the command line on the remote server to enable the background tasks. On the local computer, you’ll need an archive client to extract the friendica archive, an FTP client to transfer the files on the remote server, a text editor and a web browser to access your website.
What you need before you start
Your hosting solution will need to meet the prerequisites. Please reach out to your hosting support if you are unfamiliar with any or all of these. We are also assuming that your hosting provider gives you a web interface for database creation and management.
A decision you need to make first
Friendica should be installed in a domain of its own or in a subdomain. A domain would be something like yourself.com, whereas a subdomain might be friendica.yourself.com. What won’t work very well is a subdirectory install, e.g.: yourself.com/friendica.
Make a decision now, because you are going to have to stick with it. If you choose a full domain, you can skip to the next section of this document already. If you choose a subdomain you will need to discover how to create it. Your hosting provider will almost certainly provide a browser-based routine for this – i.e. a web interface to manage your account. Using this interface, you first create a folder/directory in which to install Friendica, then a subdomain that points to this directory. Example: friendica.yourself.com could point to a directory called friendica on your server.
Getting the tools you need for installation
If all goes well, we will only be needing one tool for this job: an FTP client used to transfer files from your computer at home to your server. You can download a fairly intuitive free one for use with Windows or OSX. It’s called Cyberduck (which is used for the screen shots in this article) or Filezilla.
If the going gets a little tougher (but not very much), we may also need an application to edit a few lines in a configuration file. We will use WordPad (ships with Windows itself) to edit that file – if any editing is required.
Getting Friendica
You can download Friendica in two zip (compressed) files. The first contains the core system and can be found here: https://github.com/friendica/friendica/releases. Be sure to grab the archive containing Friendica and the dependencies identified by the full in the filename (e.g. friendica-full-2018.05.tar.gz) and also go for the latest version. If you want to check the integrity of the full archive, you can find the SHA256 check sum here.
You will also be needing the addons – not all of them are optional for what we are doing here. Find them on this page: https://github.com/friendica/friendica-addons/releases and download the archive corresponding to the Friendica version you’re installing.
Now put those two archive files on your Windows desktop and extract them in a folder of your choice.
Then rename the addon folder you now see. It will be called something like friendica-addons-2019.06. Simply call it addon (no s) and put it inside the main Friendica folder you just extracted (there is no need to rename that one).
Additionally, rename .htaccess-dist to .htaccess if you’re using the Apache web server.
Uploading Friendica
Run your FTP client. We’ll assume you are using Cyberduck. Press the button at the top left to open a connection to the server. Then enter the details for your account, as received from your provider: Server(probably your own domain name), username and password. Finally, press connect.
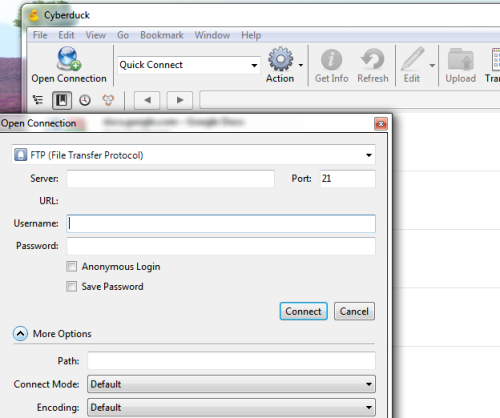
If nothing shows up in the main window, try toggling a few of the options given (passive mode, perhaps). If that doesn’t work, try another protocol – FTP-SSL or SFTP. If nothing at all does the trick (very unlikely), please call your hosting provider and ask for help.
Once you are connected to your shared hosting account, either navigate to your web root directory (if you are using a separate domain) or navigate to the directory you created for your subdomain. If you are unsure what your web root directory is, search your provider’s help pages for more information. If even that fails to make things clearer, your provider certainly deserves a phone call.
Then press the Upload button and navigate the next dialog box to the Friendica folder on your desktop – select everything in it and upload. If you are warned that you are overwriting something, allow it.
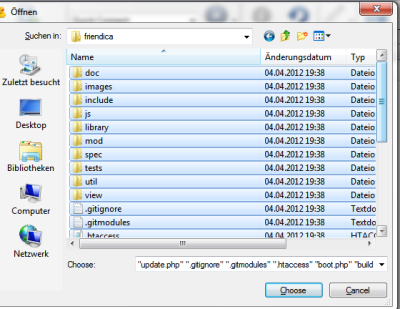
Wait until uploading is finished. Then move on and create a database.
Creating the database
To create a MySQL database for Friendica, you are going to use the web interface your provider makes available for that purpose.
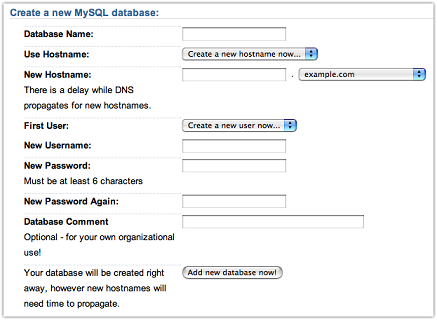
Since there are various visual (web) routines for database management in use among providers, we can’t tell you exactly how to create a database. We can only predict that it will be straightforward. When you have successfully created that empty database, we will be needing the following details: hostname, username, password, database name. Be sure to write them down or copy them to a text document. Alternatively, you can simply leave the browser window or tab with those details open as you complete the next step.
Here is a example of a database creation panel at Dreamhost:
Completing the installation process
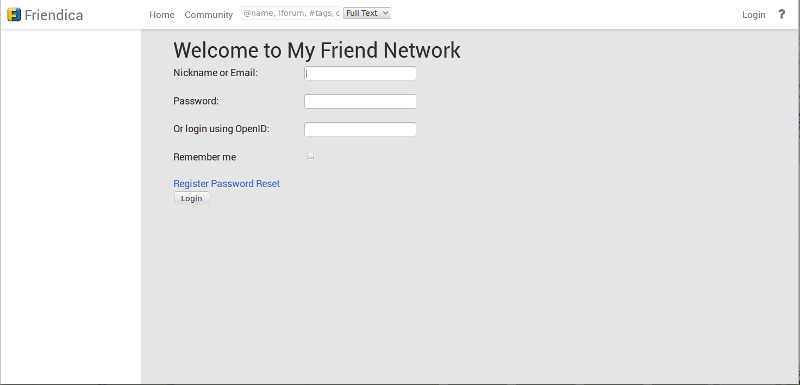
Visit your website with a web browser by simply going to the URL you planned for your site. It may take a while to load during this installation run. Then follow the instructions you see in your browser. These instructions will include entering the database details.
If there are any error messages, attempt to follow the advice given. Also go the the Troubleshooting section at the bottom of this document. If your problems persist, use an existing account or join one of our test servers and go to the Friendica Support forum for help or contact us via the mailing list.
If all goes well, on the other hand, installation will end with the creation of your personal account as a user and the admin of your new Friendica site.
Configure your account basics
You should receive an email with your provisional password. Log on using your nickname (created in the previous step) or email address and that password. Go to Settings and change the provided password to one of your choice. Then visit the Site section of the Admin menu to close registration access to your new site – this is a choice you can revise later. For a small site like the one we are aiming at for group of friends or a family, the best registration policy would be invite-only.
If you are new to Friendica, check out your Help menu for the New User Quick Start, which will walk you through the basics of user-side configuration and the content/contact model.
Activating scheduled tasks
If you have access to scheduled task (or cron jobs) on your hosting, please add one triggering every 5-10 minutes running the following command:
cd /path/to/friendica; php bin/worker.php
Otherwise, you’ll need to use the command line on your remote server and start the Friendica daemon (background task) using the following command:
cd /path/to/friendica; php bin/daemon.php start
Once started, you can check the daemon status using the following command:
cd /path/to/friendica; php bin/daemon.php status
Updates
You should follow the blog on this site for announcements of new releases of Friendica. Update instructions are provided in each release announcement.
Troubleshooting
Two main things might go wrong during installation.
- A file called
config/local.config.phpdidn’t get created or wasn’t created properly. - The database wasn’t set up properly.
These two things often go hand in hand. In most cases, the installation routine will notice the glitch and continue. At the end, you will be given some configuration code to copy and paste into a file you create and name local.config.php in the config folder. Then you simply upload that file to your server and the problem is solved.
Rarer troubleshooting
There is one more thing that can go wrong with in rare cases. It won’t affect installation or cause your site to fail entirely. But if it happens, you will notice huge delays in content exchanges with other sites on the distributed network. If this occurs, find out the correct path to the PHP command line processor from your provider (help files or phone call).
Then download config/local.config.php from your otherwise functioning site. Don’t use the virgin file from that desktop folder any more (the folder should really have been discarded by now anyway).
Find these lines:
return [
    ...
    'config' => [
        ...
        // Location of PHP command line processor
        'php_path' => 'php',
Enter the path you have discovered:
return [
    ...
    'config' => [
        ...
        // Location of PHP command line processor
        'php_path' => '/path/to/php',
Upload the revised version of config/local.config.php.